BATHROOM WALL PANELS, SHOWER PANELS AND VINYL CLICK FLOORING
From high quality PVC Shower Panels to the latest advances in Vinyl Click Flooring, ceiling2floor have a commitment to develop and supply easy to fit products that can transform your home…
What our customers think…
Our service is rated Excellent 9.6/10 by our customers
Ring & Reserve
Simply ring your local branch to check and reserve stock. Arrange collection or take advantage of our delivery service.
Ceiling2floor Branches
Branches throughout Scotland and the North East of England with everything you need to complete your bathroom transformation.
Customer Service
We have been supplying wall panels and flooring for over 20 years and in that time we have built a reputation for exceptional customer service.
OUR BEST SELLING PVC WALL PANELS
High Quality Bathroom Cladding Manufactured and Delivered by Scotland's Number 1 Cladding Company
Ceiling2Floor have everything you need to transform your bathroom with our stunning bathroom wall panels, shower panels and vinyl click flooring.
We have been manufacturing and supplying PVC bathroom wall panels, shower panels and flooring for over twenty years – proudly serving customers throughout Scotland and the rest of the UK. From modern shower panels for contemporary wetrooms to sparkle and marble panels for those who love the traditional look, we will have the right product at a price that matches your budget.
Whether you are in one of our stores, over the phone or visiting our website, if you have any questions or need any advice, just ask. Bathroom panels and vinyl click flooring can be new to many but as we manufacture our own product lines, we have product and fitting knowledge that is unmatched in the industry.
From Ceiling to Floor, we have got you covered.
STYLE & ADVICE
Bathroom
16 March 2021
Shower
16 December 2020
Flooring
16 December 2020
SIGN UP TO OUR NEWSLETTER
Register your email for news, our latest promotions, offers, advice and more...
FAQs
Why choose wall panels instead of tiles
Wall panels are cheaper, far quicker to install and you don't have to think about messy grout. One of the biggest advantages is maintenace. Soap and water, that is all you need.
How do I measure for wall panels?
Work in linear measurements for wall panels, measure the length of the wall and divide it by the width of your chosen panel. Alternatively, ring our support team with your measurements and we will calculate the number of panels.
Are PVC wall panels waterproof?
Fully waterproof. The panels come with a tongue and groove joint and we recommend a fine bead of clear silicone in between the joints to give a fully waterproof join
How do I fix a PVC panel to the wall?
We recommend fixing by pins, staples, screws or a panel adhesive. You can also fit battens to your wall or ceiling and fix the panels to the battens
Can I drill a shower wall board?
Yes. The panels are very easy to drill with little resistance. Its always good practice to either use masking tape or use a fine pilot drill to avoid drift when drilling.
I love commercials and am not embarrassed to admit it. This isn't only because my livelihood depends on advertising—I truly enjoy seeing a well-produced commercial or ad. In fact, if the Philadelphia Eagles aren't in the Super Bowl (and they rarely are), I get more excited about the commercials than about the game.
The other day I saw a terrific ad. A husband and wife are together, and a friend calls asking the man to come over because he needs to "vent." His wife is so touched by this sentimental outreach that she lets him go. Unbeknownst to her, venting means sharing a Coors Light with his buddy using Coors's newly designed can.
Very funny, but it also got me thinking about the positions we hold and our inability to vent from time to time because of where we sit. We can't vent upwards because our peer executives don't want to hear it, and we can't vent to our team because that would be poor judgment and leadership. So who can we vent to?
Well, I am inviting you over to vent. Why don't I start:
Budget planning: Can't stand it, and it never goes as planned. There's got to be a better way.
Product names that don't mean a thing to the common man.
Air travel: Has it really come to this?
Airline security: Do you feel more secure?
Golf: Why can't we hit a stationary object straight?
Vendors and golf: Do they really think that a golf invitation is the only way to get our time or attention?
The economy: We can't control it, so let's just adjust to what it is giving us.
IT complexity: Vendors make a ton of money off it. Do you think they really want to give us something that isn't complex?
Apple's iPhone: Now it is our responsibility to support whatever the end user purchases?
Gen Y: Yes, you're smart, intelligent, driven and technologically astute, but could you wait three months before asking for your next promotion?
Tell your spouse you'll be home soon; we have more venting to do. Send me your best vent. The winner will get free admittance to our upcoming CIO Year Ahead Conference, Nov. 9-11, 2008.
Michael Friedenberg is CEO and president of IDG Communications.
Drywall is not an adequate backing material for a tile shower. Even moisture-resistant drywall (often green or blue in color) is not durable enough to withstand water exposure. Over time, the drywall will deteriorate from moisture, causing your tile to sag, crack, or fall out. It's essential to use an appropriate backing material, such as cement board or Kerdi-Board, for your shower walls before tiling. This will result in a durable tile surface.
Why Is it Bad to Tile Over Drywall in a Shower?
There's no such thing as waterproof drywall. Drywall simply can't hold up to the water exposure it undergoes in a shower environment. Even the best tile job won't be able to prevent drywall from becoming soggy from water exposure or condensation. Tiling over drywall leads to mold, deteriorating drywall, and moisture in your walls that causes wood studs to rot.
Mold will form on drywall where it is used in showers.
Drywall will crumble or sag, causing your shower tiles to crack or come loose.
Wooden wall supports will be in constant contact with wet drywall, which causes rot.
Tile can be applied over drywall in kitchens and other areas—just not in showers.
You can tile over drywall in kitchens, around fireplaces, or in other areas where the wall does not come into direct contact with moisture. For showers, special steps must be taken to make sure your tilework stands the test of time.
What Backing Material Do You Need When Tiling a Shower?
It's essential to moisture-proof your shower before tiling. This means you need to use an appropriate backer board to replace any existing drywall, as well as seal and protect that backing material with waterproof joint sealing products. Standard drywall, tape, and joint compound, and other materials have no place in a shower because they will break down. Below is everything you need to truly prepare your shower for tiling.
Moisture Barrier
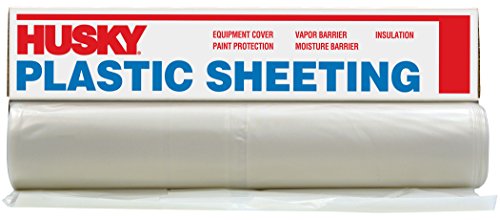
When you are preparing your shower for tile installation, first remove any existing drywall. Once you have stripped your wall to the studs, you can prepare for tiling. If you are using a traditional cement board as your backing board, you will need to install a plastic vapor barrier directly on top of the wooden studs in your wall.
Install this plastic sheeting over studs before installing a cement board.
A vapor barrier acts as a waterproof membrane that prevents wood behind your backer board from rotting.
If you are using a new style of backing board, such as HardieBacker or Kerdi-Board, no vapor barrier is necessary.
It's important to note that many new backing board systems do not require a moisture barrier to be installed. You can skip this step and save yourself some work by going with one of our personal favorite shower backing systems—Kerdi-Board or HardieBacker.
We earn a commission if you click this link and make a purchase at no additional cost to you.
Backing Board
There are several backing boards available on the market that can be used for your shower. All of them are better than both regular drywall and any water-resistant drywall on the market. You can use cement board, or a specialized backing board, such as Kerdi-Board, Wedi-Board, or HardieBacker.
A cement board is a classic shower-ready backing board.
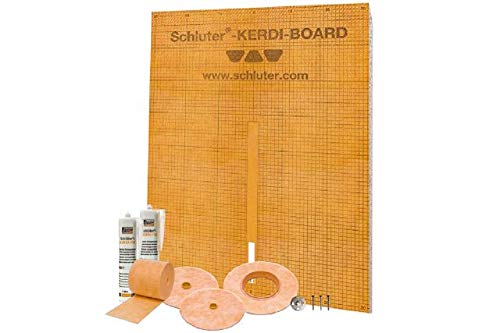
There are several backing boards available on the market. This shower install kit from Kerdi-Board has everything you need to prepare your shower for tiling.
Never use drywall as a shower backing. Even water-resistant drywall isn't suitable for showers.
Do not cut corners and use water-resistant (green or blue) drywall in showers. While these drywall varieties can hold up as walls in other parts of your bathroom, they aren't durable enough for a shower. They will deteriorate after the ceramic tile has been installed on top of them.
We earn a commission if you click this link and make a purchase at no additional cost to you.
Waterproof Tape
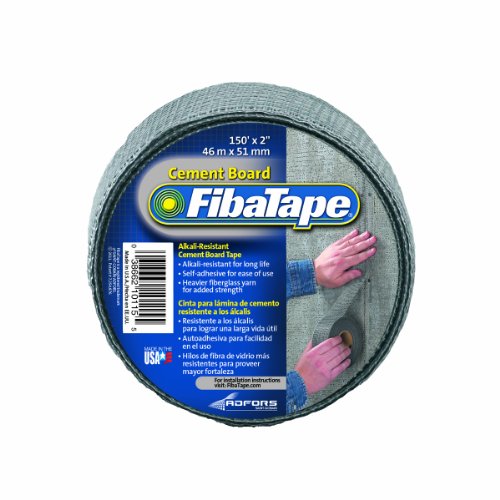
The joints between your backing board will need to be taped and floated to truly make them waterproof. However, traditional paper tape and mud aren't waterproof. You'll need to use waterproof tape or fiber tape to create a backing surface for your tile that won't break down.
This waterproof backing tape is good for showers where a specialized backing board has been used.
Use this fiber tape to seal joints between cement boards.
Never use traditional drywall tape to seal joints in your shower backing board.
We earn a commission if you click this link and make a purchase at no additional cost to you.
Specialized shower install kits will include waterproof tape, as well as tape seals to waterproof around pipes and faucets. Using a complete shower kit can make taping joints in your shower much easier.
We earn a commission if you click this link and make a purchase at no additional cost to you.
Specialized Joint Sealant and Caulk
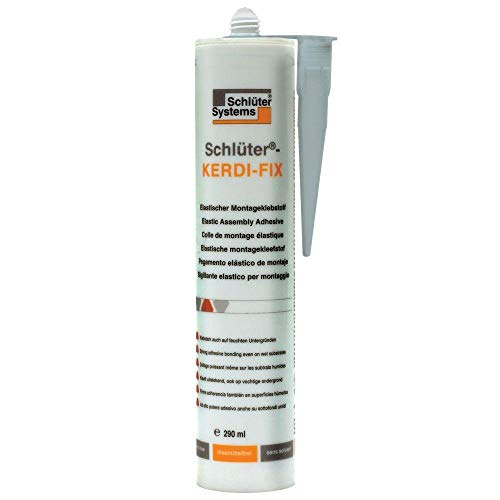
In the same way you need specialized tape for the joints between your shower backing board, you also need a joint compound that won't break down when exposed to water. Standard drywall mud will deteriorate quickly when used as a tile substrate. The following products can be used to hold your waterproof tape in place and tile-prep your shower.
Use this joint sealant in corners, seams, and where your backing board meets your tub or shower pan.
Apply this sealant-like joint compound to keep your waterproof tape in place over joints in backing board.
We earn a commission if you click this link and make a purchase at no additional cost to you.
By using the correct backing board, tape, and sealant, you set yourself up for success. Your shower walls will be prepared for tiling and you won't have to deal with moldy, soggy drywall ruining your work.
We earn a commission if you click this link and make a purchase at no additional cost to you.
Can You Tile Over Greenboard in a Shower?
Greenboard is not rated for showers and will not hold up for this application. Greenboard is water-resistant drywall, which means it is suitable for the walls of a bathroom, but not the shower itself. If it is installed in a shower and tiled, Greenboard will begin to mold and break down. You will be left with a mold-infested mess if you tile over Greenboard. Use a specialized backing board, such as Kerdi-Board instead.
Can You Tile Over Normal Drywall in a Shower?
Never use standard drywall in a shower. It will deteriorate even faster than Greenboard. Often, the entire wall will become so soft that it will flex inward when you press it. This is because drywall is not meant to be exposed to moisture. Avoid all types of drywall when creating a backing for tile in your shower. Only use approved waterproof backing board.
How Do You Waterproof a Shower Wall Before Tiling?
Before tiling your shower, remove any drywall that is present. If your shower was previously built with drywall walls, you will need to strip it down to the studs. Then, install a waterproof backer board, such as Hardi-Backer or Kerdi-Board. Seal the joints in the backer board with waterproof tape and joint sealant. Then, your shower is ready for tiling.
Hanseceramictile.com is one of the most reliable online wholesale octagon floor tiles vendors in Foshan China, manufacturing high quality tiles at low octagon floor tile prices.
Octagon Floor Tile designs contain 1 colors, 1 finishes, 1 features and 1 sizes, 1 octagon floor tiles in total.
All the hot selling cheap octagon floor tile products online are of strict quality and produced by standardization of the management.
Buy cheap Hanse octagon floor tiles for sale to add a touch of taste and personality to your house now!
In addition, gorgeous octagon tiles and floor tiles are available at Hanseceramictile shop. If you are looking for octagon tiles or wholesale floor tiles designs, you are at the right place! Welcome to buy floor tiles online from China Hanse!
Hanse - the professional Foshan China octagon tile manufacturer & supplier will continuously wok on improving the designs of our octagon tiles to ensure that you get the best import octagon tile products for your project!
Octagon Flooring, Octagonal Tiling for Floor - Octagon Floor Tile
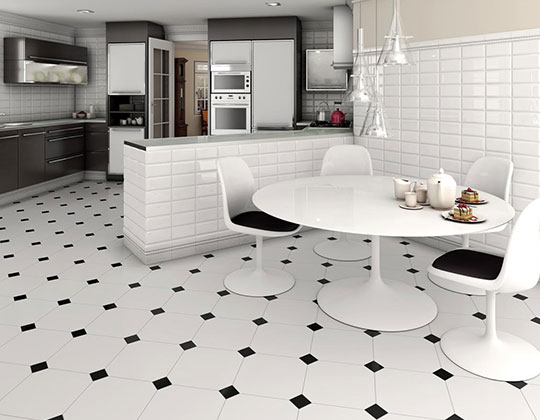
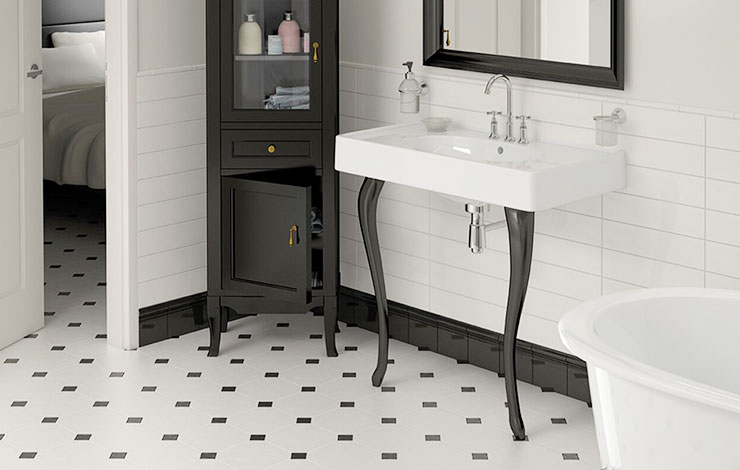
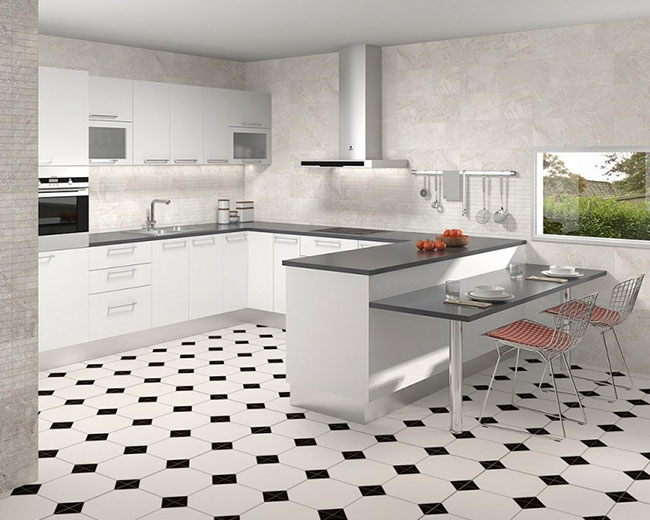
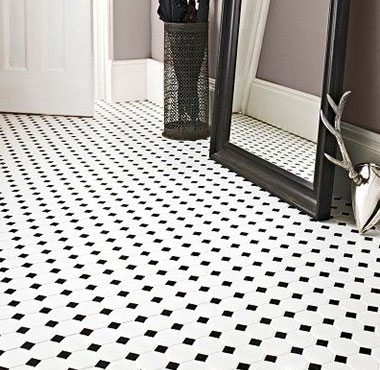
Octagon is an eight-sided polygon that alternates two types of edges. Octagon floor tile is getting popularity around the world in recent years, octagonal tiles designed according to the octagon and small square allows a diversity of classic designs, combining with traditional octagon size and other shapes, octagon flooring is ideal for bathroom, kitchen and even every room in the house. Octagon flooring tiles shows a stable structure and reliable feeling, increase a Victorian look to your home with the octagon porcelain floor tiles, octagon ceramic floor tiles and octagon mosaic floor tiles.
See All Octagon Floor Tile Products
Why Choose Octagon Tiles for Floors?
Symmetrical figure and exquisite appearance
Elevate your interior design effectively
Suitable for numerous bold or subtle style
Specific aesthetic even without complex pattern
A host of sizes, colors and materials can be selected
Octagon Floor Tile Designs & Ideas
1. Monochromatic octagon & patterned dot
Baked earth color octagonal tiles match small square with rich patterns and different tones can create a unique, classic, vintage and chic flooring, suitable for wood or bamboo furniture.
2. Black octagon & white dot
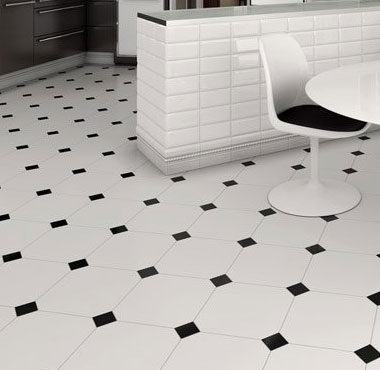
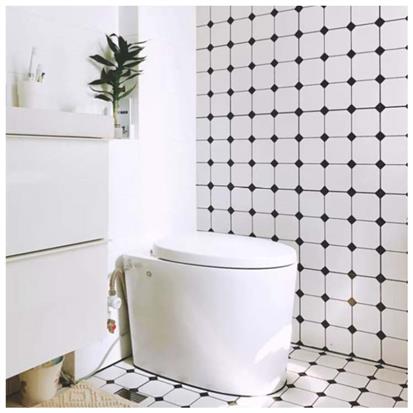
Black-white is one of the most classic and popular color combination, which is easy to match any other style and suitable for the modern home decor. Fashion, simplicity and comfort.
3. Combines contemporary and rustic styling
Each octagonal tile boasts a unique design that appears hand-painted for an artisanal look, to show both modern and traditional styles.
4. Local design
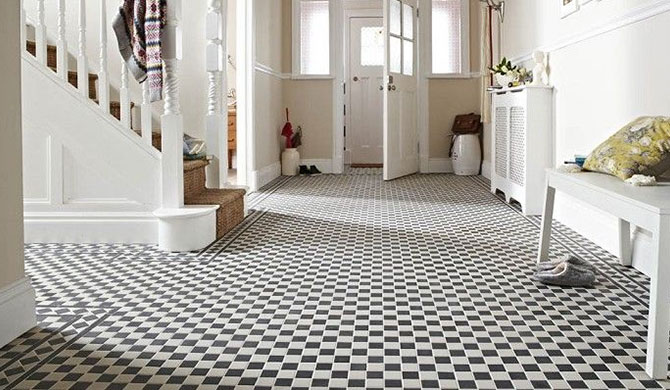
In the entrance area, apply octagonal floor tiles in three colors of dark grey, light grey and white to make the area more convenient for cleaning and allows a perfect transition with the wood floor.
How to Install Octagon and Dot Tiles for Flooring?
To lay octagonal floor tiles, you need to prepare some tools including measuring tape, scissors, tile nippers, mortar, trowel, grout, grout float, grout sponge, chalk, tile wet saw, flat board, etc.
Measure the wall farthest from the door lengthwise, find the center point and draw a chalk line from it.
Pave the tile along the chalk line at the wall far from the entrance. Practice to lay out a complete tile, which consists of a octagon and four dots.
Cut the tile to be installed on the perimeter of the room according to the patterns.
Check the flooring if is suitable for dry layout.
Apply a thin and uniform layer of mortar on the floor.
Put the octagon tile on the mortar and press it until stable and compact. You can also lay a flat board over the tiling and strike it with a rubber mallet.
Leave the mortar for 24 hours until it's dry.
Spread the grout into the lines and clean excess grouts.
Leave the grout for 10 minutes until it's dry and then use a wet sponge to wipe the tile and rinse it with clean water.
Cheap Octagon Floor Tiles for Sale - China Top Wholesale Octagonal Tiles Manufacturer
Based on years of experience and strong production capabilities, Hanseceramictile.com is ready to provide the satisfying solution for your upcoming octagon floor tiles project, our marble look octagon tile or mosaic octagon flooring or other types designs can well integrated with your home decoration. We have the greatest selection of durable and quality octagon flooring tiles available online at the best prices. A lot of specific graphics are provided to give you a better idea for octagon floors, which are available in white, black, etc. Matte, honed, polished, glazed, unglazed, glossy and lappato are offered for differ surfaces.
Our Range of Octagonal Floor Tiles - Sizes, Finishes, Applications
We have the most classic black and white ceramic octagon tiles for floor and wall, available in different sizes, finishes and applications, more designs can be expected.
Sizes: 300 x 300mm, 600 x 600 mm, customized, etc.
Finishes: polished, glazed, unglazed, honed, matte, gloss, etc.
Applications: bathroom, washer, toilet, kitchen, swimming pools, etc.
Why Choose Hanse Octagon Floor Tiles
Waterproof, anti-slip and corrosion resistance
Highest quality standards and strict inspection system.
Natural beauty, elaborate design and realistic look
Carefully selected and packaging, reliable protection
Consistent in size, dimension, specifications and surface finishes
Factory wholesale octagon floor tiles prices and rapid delivery
Finding out that you have black mold in your home can be a nightmare. Not only does black mold smell foul and make your house look unclean, but its presence can also cause serious health problems, including stuffy nose, sore throat, coughing, burning eyes, skin rash and lung infections. Some studies even suggest that black mold can cause the onset of asthma, and people with immune disorders or chronic lung conditions are particularly at risk for negative side effects.
While severe cases of black mold are best handled by a professional, you can treat it yourself if you're willing to put in the work and take appropriate safety measures. Be aware, however, that you're signing up for quite the project.
Getting Started
Because exposure to black mold can cause serious health problems, it's vital to take proper safety precautions while treating a mold outbreak. First, you need to remove anything that could be causing moisture in the area, since otherwise, the mold is likely to grow back. An exhaust fan placed near an outdoor opening can also help remove mold spores from the air, although you shouldn't use an expensive one — the fan is likely to get covered in hard-to-remove spores, so you're probably better off throwing it away when you're done. Be sure to tape cardboard or plywood around your windows to prevent spores from reentering.
Photo Courtesy: NurPhotos/Getty Images
Additionally, you should take care to seal the doorway with heavy plastic and duct tape to keep the mold from spreading. During removal, be sure to wear long-sleeved clothes you can dispose of later, goggles, rubber gloves and an N-95 or P-100 respirator. Make sure heat, air-conditioning and other ventilation systems are turned off with vents covered during removal, and slightly dampen any dry moldy areas with a pump sprayer to avoid spreading spores. Doorways should be covered with overlapping sheets of plastic. Any carpeting should be wrapped and taped in 6 millimeter plastic, and any mold-covered items or trash should be double-bagged before disposal.
Removal
If the mold has spread to any significant degree, you'll likely need to not just clean the outside of walls, floors and even ceilings, but also get inside them. Baseboards and trim in areas with signs of mold will need to be removed using a crowbar, and you'll want to test stained or damaged areas for deeper mold spread into the insulation and wall framing. You may need to cut away your drywall to identify the full extent of the damage, which means shutting off power lines and carefully poking holes through damaged areas to identify wires. During that process, you'll need to continue moistening moldy areas to keep them from releasing spores. You may find rot that needs to be replaced, which can be a project in and of itself.
Photo Courtesy: Ethan Miller/Getty Images
Once the compromised surfaces and materials have been removed, use a wet/dry vacuum to clean up debris, ideally while using a long hose with the vacuum base outside to contain spores. Afterward, you'll need to clean out the hose, tank and attachments with a mixture of bleach and water, and the filter will need to be (safely) disposed of.
Scrubbing Surfaces
While 1 quart of water mixed with ½ a cup of bleach is a solid and reliable cleaning agent, other options for treating black mold do exist. Tea tree oil can be a surprisingly effective choice, and you can buy it at your local health food store; just make sure that it includes 30 percent terpinen 4-ol and 15 percent or less cineole. Just add one teaspoon of tea tree oil for every cup of water. (This same recipe also works with grapefruit extract, although it's not quite as effective). You can also use Borax, vinegar, or ammonia. Be aware, however, that bleach should never be mixed with vinegar, ammonia or rubbing alcohol. When in doubt, do not combine cleaning agents.
Photo Courtesy: Justin Sullivan/Getty Images
Using a soft brush and the solution of your choice, scrub any remaining mold stains until no trace of the mold can be seen. Do not rinse any formerly moldy items after they're cleaned; instead, wipe away any remaining moisture. Allow trim and other salvageable items to dry in direct sunlight, and use dehumidifiers and new fans to dry out the problem area for three days. If you find more mold during that time, repeat the steps above. Finally, seal wood surfaces with an oil-based primer or pigmented shellac, and if necessary, install new insulation and drywall. Use latex paint that contains a mildewcide (or add one yourself) to restore walls and prevent a second outbreak. Reinstall the trim.
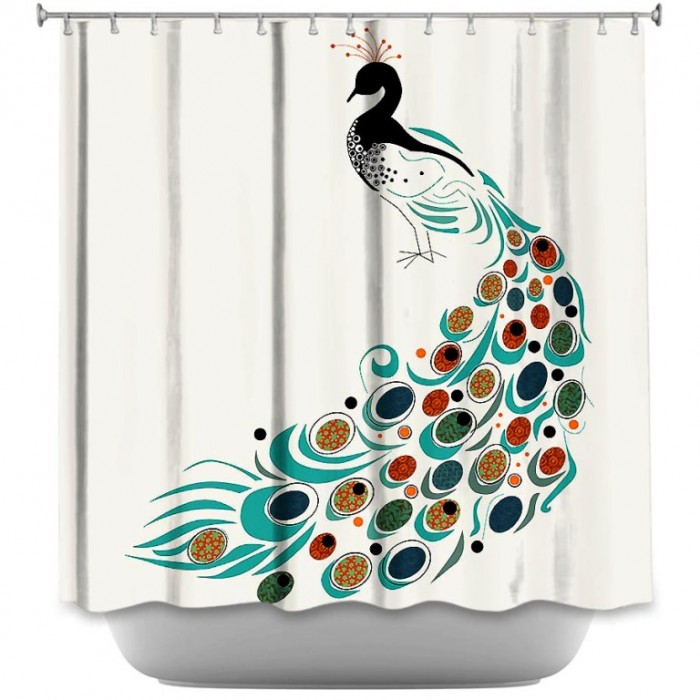
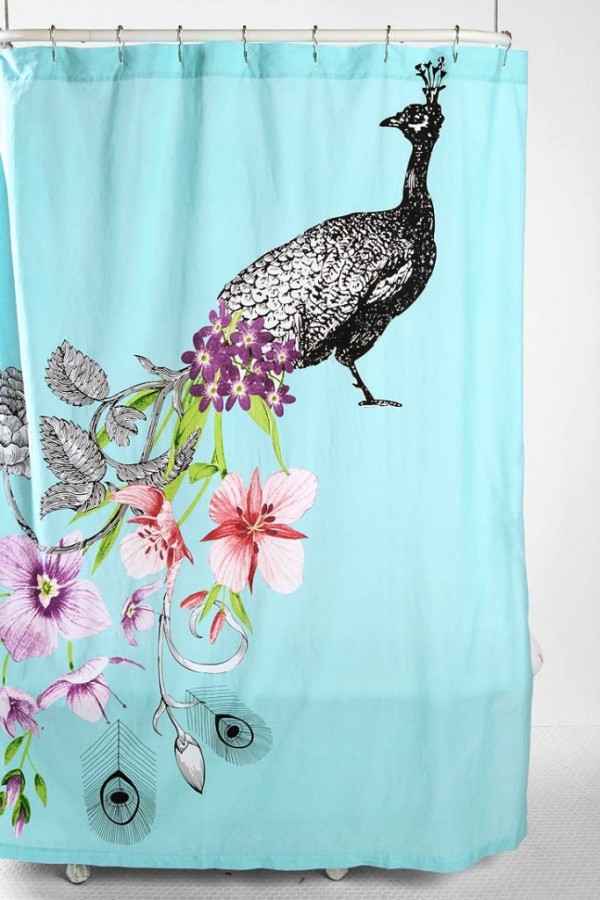
We have mentioned in our previous articles how the shower curtain plays an important role in determining the overall design of your bathroom. We've explored colorful curtains, stripes and patterned curtains. Today, let's check out these Peacock Shower Curtains in 10 Colorful and Eccentric Designs. They might look strange to you at first, but we all know just how beautiful the male peacock's tail is. It has different colors and of course, the well-known eye pattern. The peacock is a classic beauty and it will surely add class to your own bathroom.
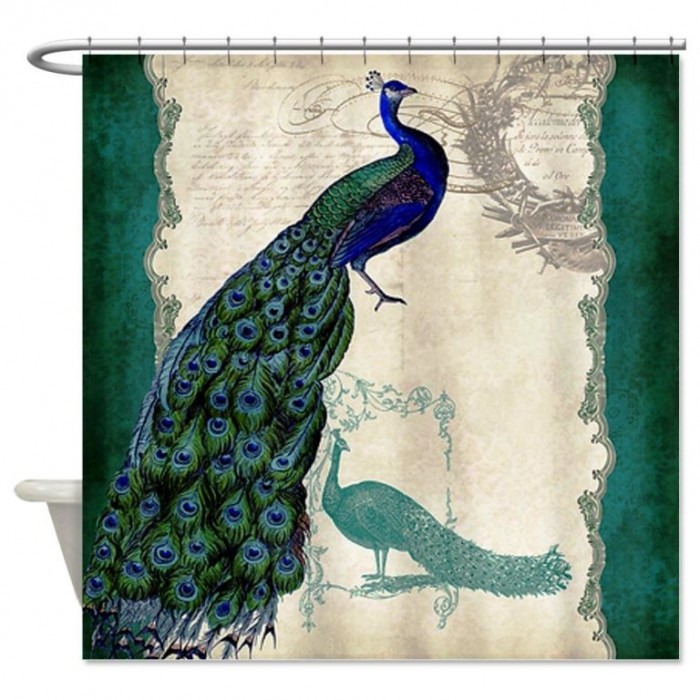
Classic and Beautiful Peacock Shower Curtain Design
Classic and Beautiful Peacock Curtain Design
Image source: Amazon
The dark blue green base color of this peacock shower design from Amazon has a definite touch of elegance to it. The backdrop looks like an old letter and there is a classic border design.
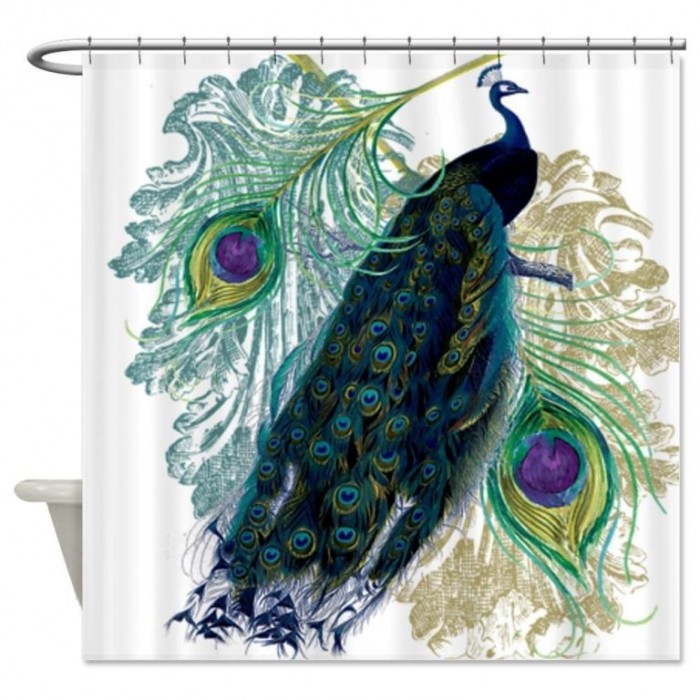
Classic Blue Shade Peacock Shower Curtain Design
Classic Blue Shade Peacock Shower Curtain Design
Image source: Amazon
We love the patterns and the color scheme of this Classic Blue Shade Peacock Shower Curtain Design from Amazon. There is an overlay of leaf designs and the small eye patterns are emphasized in two big prints.
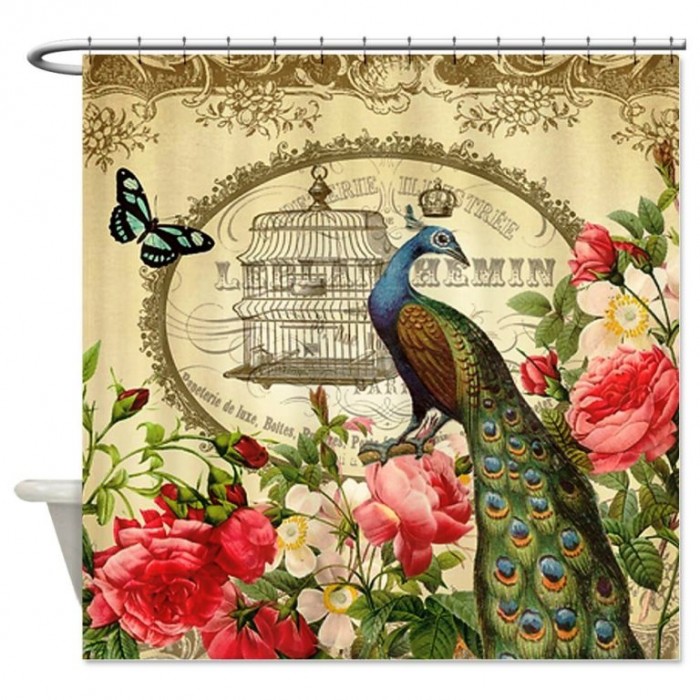
Classic Floral Colorful Peacock Curtain Design
Classic Floral Colorful Peacock Shower Design
Image source: Amazon
We love this even more classic design from Amazon. It has colorful flowers, a butterfly and a green blue peacock.
DiaNoche Designs Peacock Print by Marley Ungaro
DiaNoche Designs Peacock Print by Marley Ungaro
Image source: Shower Curtain HQ
This Peacock Shower Curtain design from Shower Curtain HQ looks like a sketched design. It is beautiful, colorful and creative and will look good in your bathroom.
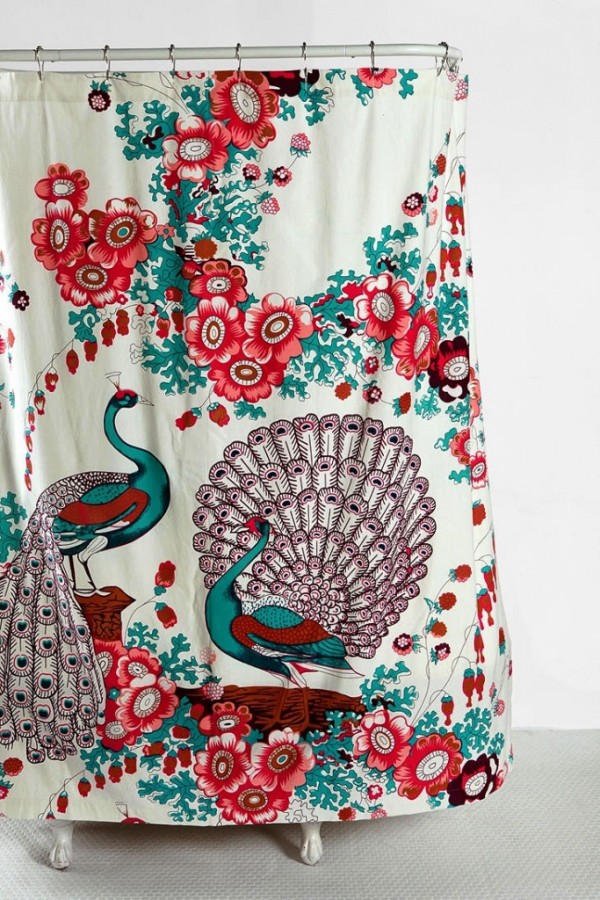
Floral Pattern Peacock Curtain
Floral Pattern Peacock Curtain
Image source: Inool
This peacock curtain shower design has a great blue and red color combination on a white base color. It will look great in an all white bathroom.
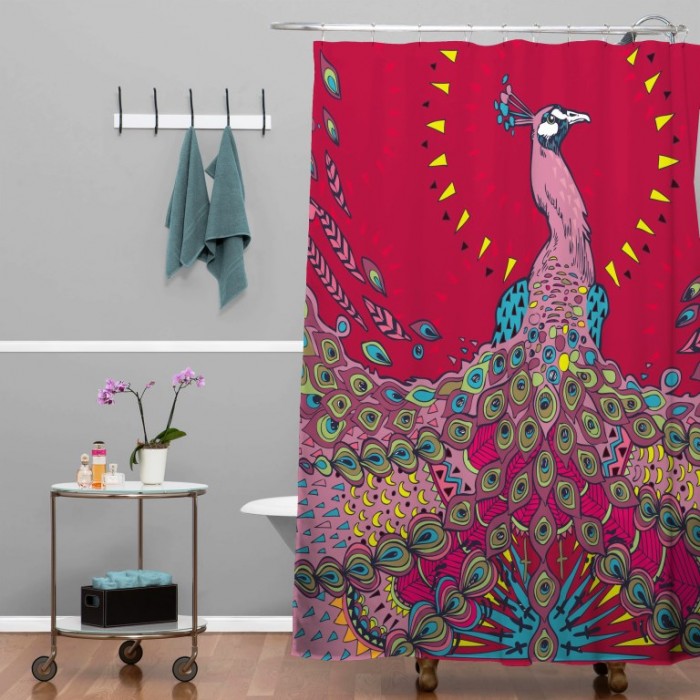
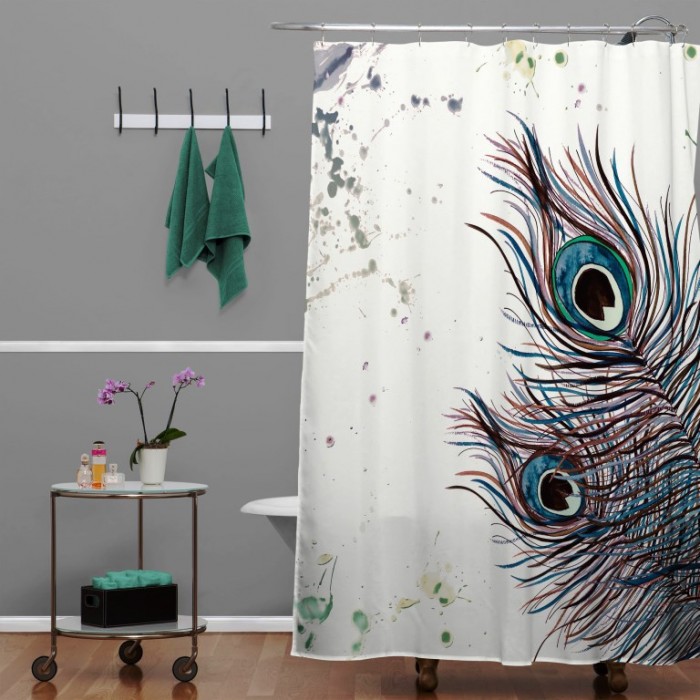
Geronimo Studio Red Peacock Shower Curtain
Geronimo Studio Red Peacock Shower Curtain
Image source: Deny Designs
We love the creativity and colors in this boho type of peacock shower curtain design from Deny Designs. It will look great in a light and airy bathroom to give it life and add some color to it.
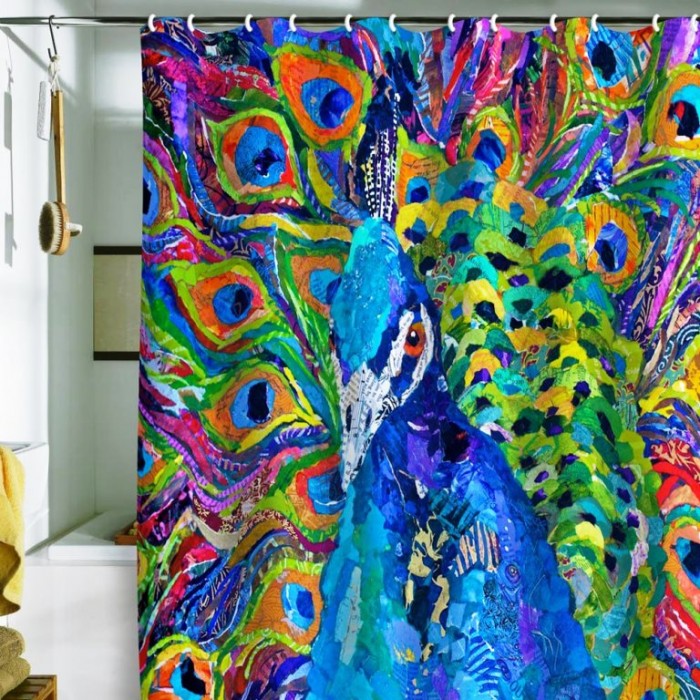
This peacock curtain design may look eccentric and scary for some because of the red eyes of this colorful peacock but those artists and artists at heart will truly appreciate this piece.
Refreshing Flower and Peacock Light Blue Shower Curtain
Refreshing Flower and Peacock Light Blue Shower Curtain
Image source: Pinterest
If you want a refreshing touch to your shower room or bathroom, this peacock shower design from Pinterest is a great addition to your bathroom.
Finishing your basement can add extra room to your home and also increase it's value. Even if it's currently full of boxes and discarded items, your basement probably has lots of potential.If you do it right, it might just become the most popular space in your house, and for a lot less than adding on. Find out how to turn this underutilized space into a place you'll love to spend time in.
Before You Start
You will want to make sure your basement is dry and free from damp areas.
Many local regulations require that the basement is a least seven feet tall, so always consult your local building codes.
If you want to add plumbing or wiring, you need to check your existing systems to see what upgrades have to be done. You'll also need a permit for this work.
Insulate and waterproof your walls.
Basement building codes require installing egress windows to allow for emergency escapes.
Seal around pipes and wires and insulate the pipes.
Plan Your Layout
Take time to draw up a simple layout plan and chop and change as needed. It's easier to change things on paper than to change your mind once you're already remodeling. Put the main socializing area in a spot that receives the best natural light if possible. Place the TV-viewing area in a darker space to reduce glare and create a home theater feel.
Think about including a bedroom and bathroom, this makes an ideal suite for teens or guests. Building codes require that bedrooms need an egress window, so they'll have to be located on the perimeter. Decide on the best room size for your needs. To comfortably fit a double bed the room needs to be a minimum of 125 square feet.
You may want to include a wet bar or mini kitchen to make basement entertaining easier. Including a mini kitchen turns a basement with a bath into a complete guest suite. A Laundry room is another great basement addition, but it needs a floor drain and access to an outside wall for the dryer vent.
Finish Walls and Ceilings
Basement walls are usually made of poured or stacked concrete block. These materials reinforce the feeling that the basement is a secondary space. To give your basement main-floor style cover the walls with your choice of material, such as drywall, paneling, plywood, or paint. When it comes to basement ceilings you can choose to use paneling, put in a drop ceiling, or leave everything exposed and paint it with a sprayer.
Flooring
Concrete floors can be painted, or covered with vinyl, laminate, tile, or carpet. Choose whatever is most comfortable and practical for your lifestyle.
Install Good Lighting
A good lighting plan is key to banishing gloom and making your basement and inviting spot to gather. In addition to recessed lights, consider track lights and pendants to help eliminate shadows in areas where you'll be reading, working, or playing. Floor and table lamps are another great way to illuminate the surroundings.