Best Silicone Caulk For Bathrooms
When you talk about caulking in the bathroom, the topic is more broad than you might first suspect.
There is caulking the bathtub, caulking the shower, under the toilet, on baseboards, around bath and shower tiles, around sinks, back splashes, faucets and on and on.
It can be overwhelming figuring out what the best bathroom caulking is and what sealant works best depending on the surfaces and joints you're trying to seal.
To learn more scroll down and read below.
If you can't wait and just want our Top 5 recommended bathroom caulking products, here they are.
This list is solidly based on how well the products perform, how easy they are to use and the unique features each provides.
Our Top Recommended Caulks & Sealants
Considerations When Choosing a Sealant
Mold and Mildew

Caulking bathrooms has other considerations too, such as mildew and mold-resistant caulks and sealers.
Do they really work?
Yes they can, but stick with the most reputable brands here, namely DAP – Kwikseal , Sashco and GE Kitchen & Bath.
In the photo above, a mold resistant sealant was used in this sink.
The problem is, once the caulking starts to age it will crack and start to disintegrate.
When this happens, water will sit in the gaps created where there isn't sealant anymore.
With every-day use, this can lead to mold. What you end up with is a dark mold sitting in seams and cracks.
One tip…
Ensure your application of the sealant goes on smoothly.
If it goes on rough, with grooves and other uneven "textures" to it, water will be less apt to fall off of it.
Even a mildew resistant caulking over time will succumb to mold as time goes by.
Colors Anyone?
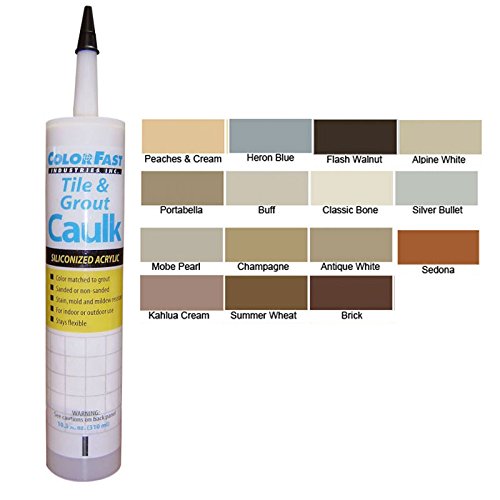
You're probably thinking about bathroom sealant colors too, along with the question of whether or not caulks are all paintable.
The most common colors are of coursewhiteandclear. Sometimes you have to look closely, but every tube and box will be labeled with its color.
Household sealants will also come in tan, brown, gray and sometimes black.
For bathroom wall and floor tiles you might want to choose a color that compliments the tile colors.
What about Paint?
If you want other colors, you may have to out your paint brush.
Not all sealant types we're talking about here take paint all that well, but some do.
For example, don't paint silicone or latex types. Again, this will be evident on the tube.
Look for urethane types and also in the fine print to confirm.
The key is to not just assume it's okay to pain, as painting even the best caulk will just result in future cracking and chipping away of all your hard work.
Finally, once you've determined the caulking to use in your bathroom project, it comes down to how to caulk your bathroom.
What are the techniques and caulking tips that will be the most helpful to you, so you can make it look clean and professional, and without it taking hours?
We cover this more below!
Of course, you want to caulk your bathroom efficiently so it can accomplish its primary purpose: to provide an elastomeric (flexible) seal between joints and other gaps like cracks.
Ok, let's first take a look at the various places where you might be caulking in a bathroom.
How to Caulk a Shower

It goes without saying that a shower stall needs caulking in many places, such as around shower doors (and rails for sliding doors), walls, pans, handles, etc.
You already know that shower caulks should be waterproof and flexible enough to move with the weight of a person shifting around and moving and closing doors.
When caulking a shower stall, it's also important to find a product that labels itself as resistant to mildew.
Most of your caulking will be around the shower pan, where the pan comes up to meet the shower wall.
Whether you have ceramic tile or any other kind of stone or tile, fiberglass or plastic, unless you have a complete enclosure, you'll have a joint between the pan and wall.
In addition, sometimes, if the tile job was sub-par and wasn't cut well even with a tile saw, you may have uneven seams or larger gaps you'll want to fill..

You'll want to use a silicone caulk that is made for showers and tubs.
The important point?
Just keep in mind here that bathroom caulking is both an adhesive and a sealant.
This means, as with any adhesive (like glue or tape). the surfaces that it's sticking to must be both clean and dry.
That means, you obviously don't apply shower caulking too soon after a shower.
And if you have any leaks, ensure that no water has crept up into the shower walls or under the pan.
If it has, make sure it all dries out before applying new shower caulking.
As a temporary fix, you can even use shower and tub caulking to seal any cracks in your tile grout – or even if some of your grout is missing like in this photo.

If you need to get rid of the old caulking first, do so by digging it out carefully with a utility knife or learn how to remove caulking.
Scrape away the old stuff until surfaces are even and smooth.
You'll be thankful you went to the effort later, as your new shower caulking job will go on nicely, look better and last longer.
Dap makes a great caulk for tubs, showers and shower inserts /enclosures.
Dap and its Kwikseal line is probably the most popular and trusted high quality brand.
Tube sizes?
As a DIY homeowner, you'll be fine just buying a hand-squeezable tube of the stuff.
It usually comes in a 5.5 oz. size. That way, you can just hold it in your hand and have easier control over the flow of it as it comes out.
If you get this (and any bathroom caulking for that matter) in a 10.1 oz. size designed to be applied with a caulking gun, then it may be more difficult depending on your experience.
A gun can take some time to get used to using.
That, and the fact that you may be buying more shower caulk product than you need.
A small tube usually does the job for one shower, including sealing around shower doors.
You can get it in a variety of colors. Keep in mind that a "clear" caulk will always go on white, then dry to a clear or transparent color.
See the bathroom caulking tips section below for more advice and application techniques.
Bathtub Caulk

Caulking a bathtub has nearly the same considerations as the points mentioned above for the shower.
Of course, you want to seal the joint where the tub meets the walls in the same way as a shower pan.
Some tubs may not be designed with a shower, and as such, won't have waterproof walls surrounding it, or even doors.
Keep this in mind…
Important things to remember when caulking a bathroom tub is to ensure you caulk adequately around the faucet handles and tub spout.
You do not need to caulk the tub's overflow opening (often where the drain plug lever is), as that has a rubber seal behind it.
Where else to seal?
Other places you might want to caulk around showers and bathtubs is actually outside the "wet" area.
We all know that splashes and drips make their way out of the tub or on the floor where people step out of the shower.
It's a good idea to caulk the base of bathtubs at the joint of the floor and start of the vertical side of the tub.
You can go one step further and caulk along baseboards near the tub or shower.
You never know when you'll have a large leak that starts to spread across the floor.
In fact, many problems related to bathtubs and shower leaks are actually because of water getting out and dripping through joints and gaps on the "outside", at the bathroom floor.
Caulking Sinks in the Bathroom
Always ensure a healthy bead of caulk is placed around sink edges, whether they sit on top of the counter or are mounted underneath.
Apply caulking around the faucets and handle bases.
If you apply just the right amount, use a caulk color that suits the coloring of the counter and sink, then you won't even notice sink caulking!
Caulking Toilets in the Bathroom
It may seem obvious, but be sure that caulking is at the base of toilets.
It doesn't help to stable a rocking toilet, but it will help stop water should any bathroom leaks arise.
Bathroom Shower and Bathtub Caulking How-to (Techniques)
People often struggle with getting bathroom caulk applications to look "good".
How do you get smooth strips? How do you make corners sharp?
Keep in mind that not everyone is going to be as skilled at putting on caulk, and different caulking techniques will work differently for various people and situations.
Here are some general guidelines and "how-tos" that will be useful to you.
They will hopefully help you decide which caulking technique will be comfortable and efficient for you; producing the results you're after.
Smooth at the End
You will always need to smooth out the caulk bead after application.
No one is good enough to just squeeze out this substance and have it trail evenly along every edge, seam and corner.
Practice First!
Don't hesitate to practice a little bit if you're new to applying caulk.
You need to get the hang of just how much you need to squeeze out as you go along the joints in your bathroom area.
Too much, and you end up with a mess to clean up as you even it out. Too little, and you won't fill gaps and seams adequately.
Find what makes sense, using say, a the inside of a cardboard box for practice.
Moisture Is Your Friend
Always use something moist (preferred) or a non-stick material to smooth out bathroom caulking.
Pros most often use either a wet finger (kept moist by a small cup of water nearby or a wet sponge) or a wet towel (clothe or paper).
Using your fingers gives you the most control.
Just get them damp only; you don't want water dripping behind the caulk as it's drying.
Other recommendations include using an old, small spoon that you dip into a mixture of soapy water each time.
It provides just the right moisture balance, a smooth surface, and perfect shape for most corners.
Again, experiment and do what feels right to you.
Use a Sealant Applicator
There are also lots of great applicators on the market.
The best thing to do is to invest in a set that you can use for any new projects as well as re-applying as you maintain all the seals around your house.

Sealant Tool Silicone Tool Kit
It helps collect the excess caulk as you smooth things out.
For a few bucks, it's worth having on hand to save some time…and your sanity!
When you first get one of these kits, just take your time in getting familiar with how they fit in your hand and how you can best use them.

Once you get the hang of it, it could possibly make your bathroom caulking projects much easier and with a professional appearance you can admire.
Get It Straight
To get straight lines, you can always use painters tape, and run a line of tape offset (both top and bottom) from the joint you're caulking.
Before the caulking dries, you can remove the tape to reveal a very even caulk edge.
You can also create clean edges by using a plastic putty knife and trimming the edging that way.
Bathroom Caulking Tips
Here are some basic tips and ideas to think about as you prepare and begin caulking your bathroom:
Old Looking Caulk Isn't Doing Its Job
You know it's time to address bathroom caulking issues if you see crumbling or even cracked caulking.
This is a sure sign that the caulk in your bathroom has become old and dried out.
And this means that it's not doing its job of keeping moisture from where it's supposed to go.
If you see black or green mold on the caulking, that tells you that water has penetrated the surface of the caulking and is staying inside, helping the mold stay alive.
In other words, the coloring is not just unsightly, it's a sign that it's time for new caulk in your bathroom.
Apply to Clean Surfaces Only
The best bathroom caulk is the one that is applied to clean and dry places.
Use What Everyone Else Uses
Make sure you buy a type such as Dap brand, where you see a lot of that type given space on store shelves.
That means people from DIYers and professionals use it, and keep using it. Don't keep it too long, as it ages, even in it's container (tube).
Curing Time Is Important
Always let bathroom caulk jobs cure (dry) completely before exposing to water.
Not only should it not be tacky to the touch, but should be allowed at least as much time as the manufacturer suggests in the instructions for drying time.
What Caulk Can You Paint?
Silicone or latex bathroom caulk isn't going to accept paint.
For that use a Urethane or Polyurethane type of caulk.
Make Sure Everything Is Sound First
It may not be a good idea to caulk a sink or bathtub that isn't solid itself.
In other words, if it moves or gives with the weight of a person or when filled with water, you're only going to decrease the stability of your seal.
It's made to flex, but there is always a limit!
A Handy Trick For Hard to Reach Spots
For hard-to-reach places, such as behind sinks, tape on a drinking straw to the end of the applicator and bend it into the area you're having trouble reaching.
A Tip For Cutting the Nozzle
Cut the nozzle opening slightly smaller than the bead size you want; usually between 1/16″ and 3/8″.
Caulking bathrooms can be one of the DIY procrastinating jobs.
But when the time comes, just be sure to prepare your surfaces well and apply caulk in a way that you find best works for you.
You'll be happy that you took the time to learn the tricks of caulking in your bathroom.
Best Silicone Caulk For Bathrooms
Source: https://homerepairgeek.com/bathtub-plumbing/bathroom-caulk.html


Tidak ada komentar:
Posting Komentar