Bathroom Sink Paint
I mentioned when I shared my bathroom makeover the changes I made in this room didn't require any major renovations. One project involved transforming the vanity with sink paint, and today I want to show you how I did that.
My vision for an all-white bathroom with brass accents didn't include a budget for replacing the vanity. I've heard of people painting their sinks before, but I was really skeptical about trying it.
Can you paint a bathroom sink?
Yes, you can! Although I was skeptical, after thinking this over I decided to go for it. I really couldn't live with the off-white vanity and sink throwing off the whole vision for the bathroom.
Bathroom Sink Paint
I did a ton of research and ended up choosing Rustoleum Speciality Tub and Tile paint for the sink and vanity top. Rustoleum had two options available for this sink paint. Option one is sold as a kit, requiring part A and part B to be mixed and painted on with a brush. Option two was a spray paint already mixed.
I chose spray paint. The reason for that was after painting my niece's counters a few years ago (which came out beautiful) we decided to add a glaze. The glaze was one of those kits that needed to be mixed. It was difficult to use and the results were not what I was hoping for, I vowed never to use that or anything like it again.
What You Will Need*:
Rust-oleum Speciality Tub and Tile Spray Paint in White
Plastic Drop Cloths
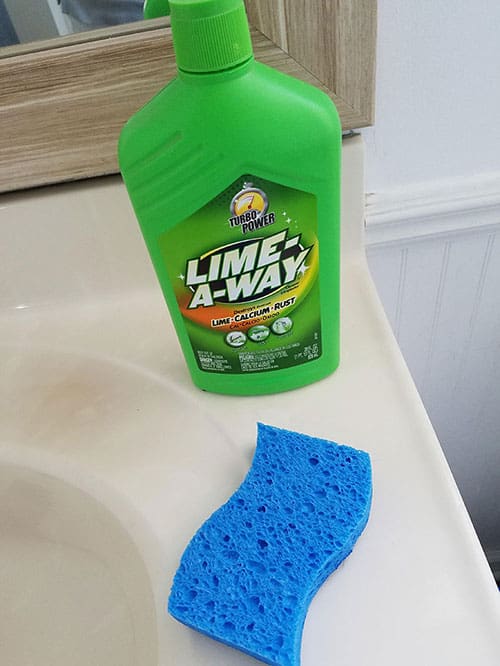
Lime Away
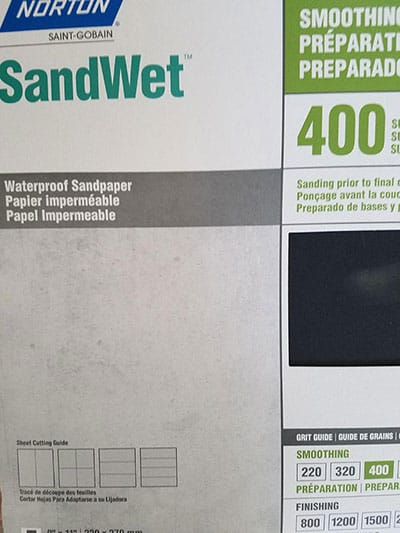
Wet/Dry Sandpaper (I used 400 Grit)
Bleach
Scrubber Sponges
Soft Scrub or Comet
Protect Eyewear
Face Mask
Preparing To Use The Sink Paint:
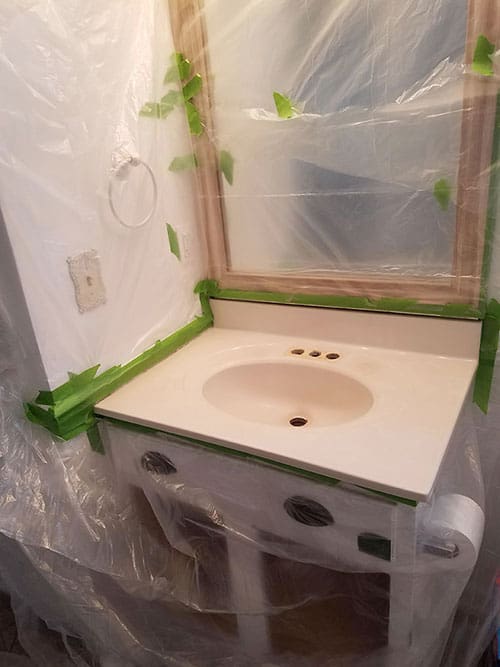
Remove the faucets and barricade the surround area.
Using spray paint indoors definitely presented some challenges as well. The prep needed to be really good to protect everything else in the bathroom. I went to town using plastic drop cloths to cover everything in sight around the bathroom sink. My husband had removed the faucets for me also.
Just looking at that yellowish sink makes me cringe!
Once I had everything barricaded, I read the directions multiple times before attempting this. I followed the directions to the letter because I was really nervous about messing this one up.
Prep and Clean the Sink
If your sink has any chips or cracks, they will need to be filled in with liquid steel first. Fortunately, mine did not.
Clean the sink with a mix of bleach and water to eliminate any possible mildew. Repeat if necessary and rinse well with water. My sink didn't appear to have any mildew, but I went ahead and did this step anyway.
Next, I cleaned the sink with an abrasive sponge and abrasive cleaner as per the directions. They suggested Comet, but I used Soft Scrub. This step is to remove all oil, soap, grease and hard water deposits.

The next step says to remove all caulk and clean those areas with a non-oily solvent such as rubbing alcohol. I skipped this step completely. So maybe I didn't follow all the directions to the letter after all. 😉
Now you're ready to scrub it again with an abrasive pad and Lime Away. This step is to create a porous surface for better adhesion. Allow the lime away to sit on the sink for 5 minutes. Scrub the entire surface again and rinse with water.
Next up is sanding. Sand the entire surface with a wet/dry sandpaper. Rinse thoroughly with water after.
Allow the surface to dry for at least 90 minutes after this step before painting. Wipe the sink with a clean tack cloth right before painting to remove any dust.
Using the Sink Paint
The directions say to use this sink paint in a well-ventilated area and I cannot stress that enough. Also, make sure to have a mask and eye protection for this one. Admittedly, I sometimes get lazy when it comes to the personal protective wear with DIY projects, but DO NOT SKIP IT ON THIS PROJECT. The fumes are horrendous. And that's an understatement. Splurge on the better quality respirator mask for this one!
How To Paint A Bathroom Sink
You use this paint just like any other spray paint. Shake it well, hold the can 10-16″ away from the sink and spray in a steady back and forth motion. Apply 2-3 light coats letting each one dry in between for 15 minutes.
The sink paint takes 15 minutes to dry to the touch but will take 3 days to fully cure. Before you begin, be prepared to be without a sink for a time.

My Results
Though the fumes were so bad, I thought they might actually kill me I am really happy with how this turned out! The color is a perfect, pure white. The only thing that I was not fully happy with is that the sink surface isn't perfectly smooth like it was prior to painting. It has slight texture similar to that of a bathtub surround. Inside my sink came out even more textured, I believe because it was harder to spray evenly inside the bowl. That makes it a bit more difficult to clean now.

While I was using this paint I vowed to never use it again due to the fumes. However, after seeing the results, I keep looking at my off-white downstairs sink and thinking maybe I will.
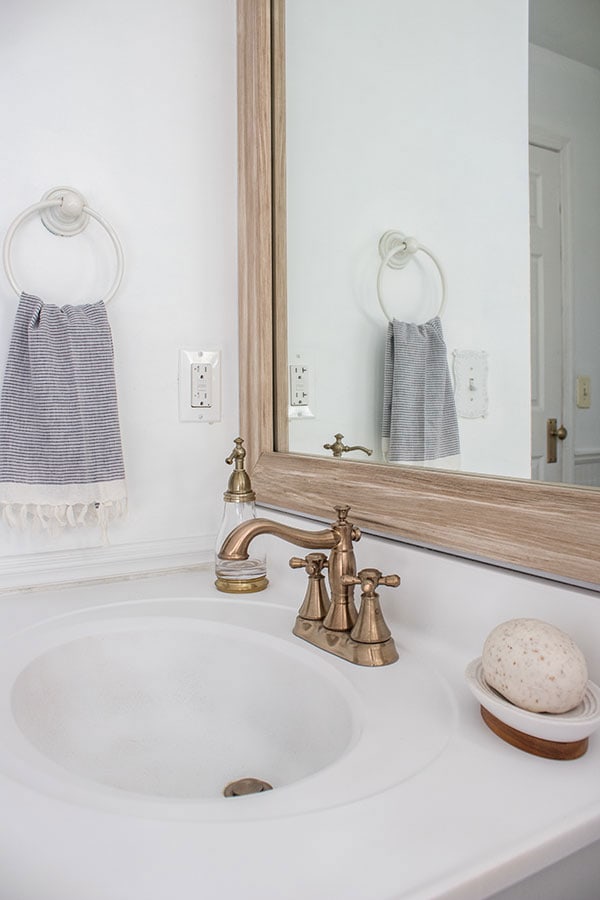
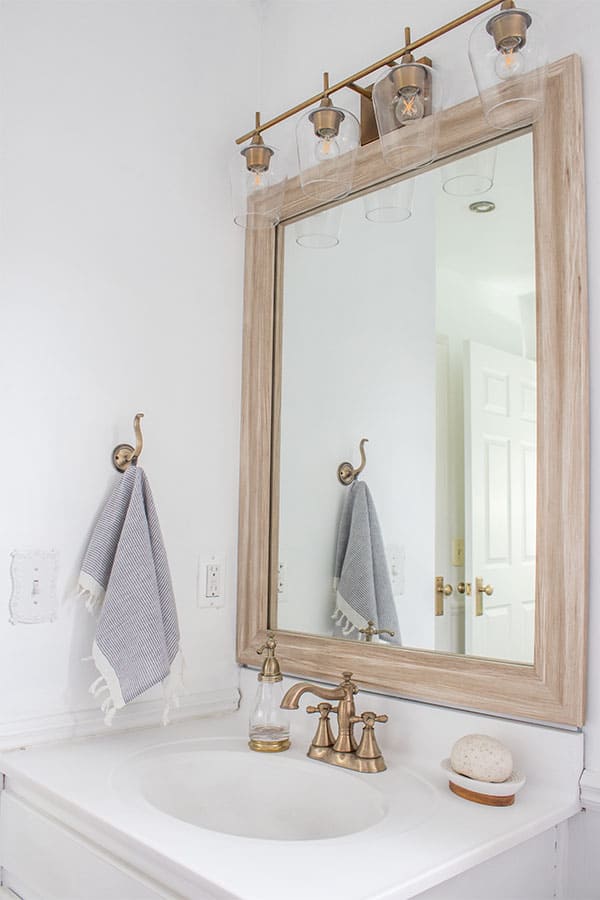
On a side note, I changed out the towel holder in here also since I shared it a few weeks ago.
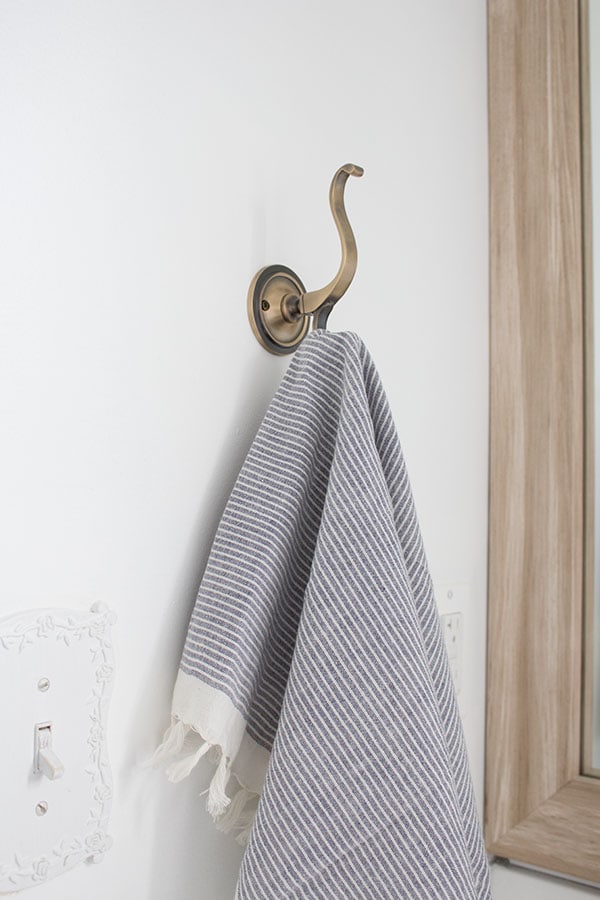
The towel holder is actually a coat hook but I love the way it looks in here. The antique brass finish matches the other metals in the bathroom.
Overall, I think using sink paint is a great temporary fix to update a sink without replacing it. Whenever I paint any major elements in my home or someone else's (for example, these painted countertops), I do it with an understanding that it's a temporary fix until the item can be fully replaced.
Here's a better look at the before and after. Feel free to pin this!

*This post may contain affiliate links, you can read my full disclosure here.
Source: https://thehoneycombhome.com/transform-your-bathroom-with-sink-paint/


Tidak ada komentar:
Posting Komentar